JavaScript
Buttons
This tip was sent to me by email but did not include any info about the author. So I give this to you and if
anyone out there knows who wrote it, please let me know so i can thank them...
There is
no simple point and click way to get JavaScript buttons. You have to get
in and learn how to edit the code. You have to use a text based HTML editor
too. My usual method is to use Netscape 3.01 Gold for the basic layout,
then go back and do the touch up work and JavaScript with Super NoteTab.
Super NoteTab is the best text editor I've ever used for HTML, and as an
added bonus, it's freeware. Not shareware, not pirated, not an evaluation
copy, just 100% freeware.
So, on with
the tutorial...
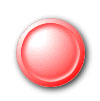
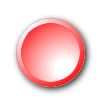
To make the
button above, I used two images: jstutor1.jpg and jstutor2.jpg.
I also used
the following code
Part 1
<SCRIPT LANGUAGE="JavaScript">
Part 2
<!-- DocOzone's Javascript code, copyright 1997
//
// Feel free to borrow and modify this code,
// but be sure leave this credit in the source!
// Your pal, -Dr. Thaddeus Ozone-
// http://www.visi.com/~drozone/ -->
Part 3
// start error trapping code
window.onerror=null;
var netscape = 0;
var goodIE = 0;
browserName = navigator.appName.substring(0,8);
browserVer = parseFloat(navigator.appVersion);
if (browserName == "Netscape" && browserVer >= 3)
{ netscape = 1; }
if (browserName == "Microsof" && browserVer == 4)
{ goodIE = 1; }
// end error trapping code
Part 4
if (netscape || goodIE) {
jstutor = new Array(1);
for (m=0; m<=1; m++) {
Part 5
jstutor[m] = new Image(); }
jstutor[0].src = "jstutor1.jpg";
jstutor[1].src = "jstutor2.jpg"; }
Part 6
function jsbtnin() {
if (netscape || goodIE) {
setTimeout('document.jstutor1.src = jstutor[1].src',000);}}
Part 7
function jsbtnout() {
if (netscape || goodIE) {
setTimeout('document.jstutor1.src = jstutor[0].src',0100);}}
Part 8
</SCRIPT>
Part 9
<A HREF="jstutor.html"
onMouseOver="jsbtnin(); return true"
onMouseout="jsbtnout(); return true">
<IMG SRC="jstutor1.jpg" BORDER=0 WIDTH=100 HEIGHT=60
name="jstutor1"></a> |
Now, it's
just a matter of breaking it down and learning what each part does.
I'm going
to add a disclaimer here and tell you that not everything here is guaranteed
to be 100% correct.
I didn't
write the code, and to be truthful, I don't fully understand it. I do understand
it enough to get it work though. If you happen to be a JavaScript maven
and you see some glaring mistakes, please let me know.
Parts 1 through
8 should be placed between the <HEAD> and </HEAD> tags. This insures
the script will be completely loaded before any of the body text or images
are displayed.
Part 1
This tells
the browser that we are dealing with JavaScript.
Part 2
The obligitory
credit to Doc Ozone, the creator of the script.
Part 3
This keeps
browsers that cannot support JS from showing it. I don't know much about
it other than that and the fact that it's a very good idea to include it.
Part 4
The first
line checks to see if you are using a good version of Netscape or MSIE
(as defined in the error trapping code).
The second
line tells the browser that we will be using a group of two images (zero
and one).
I'm not
sure what the third line does. I do know that the second variable (m<=1)
needs to be equal or greater than the highest numbered 'src" in part 5.
Part 5
The first
line tells the browser to erase the current image and display the new image
when the function is called into play.
The next
two lines define what images are to be used when the "src" things are called.
Part 6
This is
the first function. It is called with the OnMouseOver command in part 9.>
A function
is the motor that makes javascript run.
The first
line defines the name of the function. After that there's call to the error
trapping code. Then there's the line that says what to do. I'm not positive
about all this, but I'll break it down the best I've been able to figure
out.
"setTimeout('document.jstutor1.src"
- The document is defined in part 9 as jstutor1. jstutor[1].src - Tells
the browser to display the jstutor2.jpg image as defined in part 5. 000
- the time (in milliseconds) to wait before displaying the image.
Part 7
This is
the second function. It is functionally identical as the first so I'm not
going to explain the mechanics of it. It is called with the OnMouseOut
command.
Part 8
This is
the closing tag telling the browser that we are finished defining the JavaScript.
Part 9
This goes
in the body of your HTML. You would use this the same way as a linked image.
The difference
is in the addition of the OnMouse commands. They are what call the different
functions into play. There's also the addition of the "name="jstutor1""
line. This is where the "document" is defined.
That's about
the best I can do. This isn't exactly a step by step tutorial. If you want
to use the script, the best way would be to cut and paste it then start
changing it around until you get it working. Then if you have problems,
which you will, you can check back here to maybe help you sort things out.
If you are
a JS guru and feel that I did a poor or incorrect job of explaining something,
please feel free to write the correct information and send it to me.
|

